Stick your head into almost any laundry room renovation debate and you’ll see sparks fly over this one: should your flooring go under the washer and dryer or just around them? Doesn’t sound like the kind of thing couples argue over, but ask anyone who’s had to wrestle an overflowing front-loader—or peel warped laminate up from under a dryer after a leaky vent hose—and you’ll see why opinions can get pretty hot.
The Pros and Cons of Installing Flooring Under Appliances
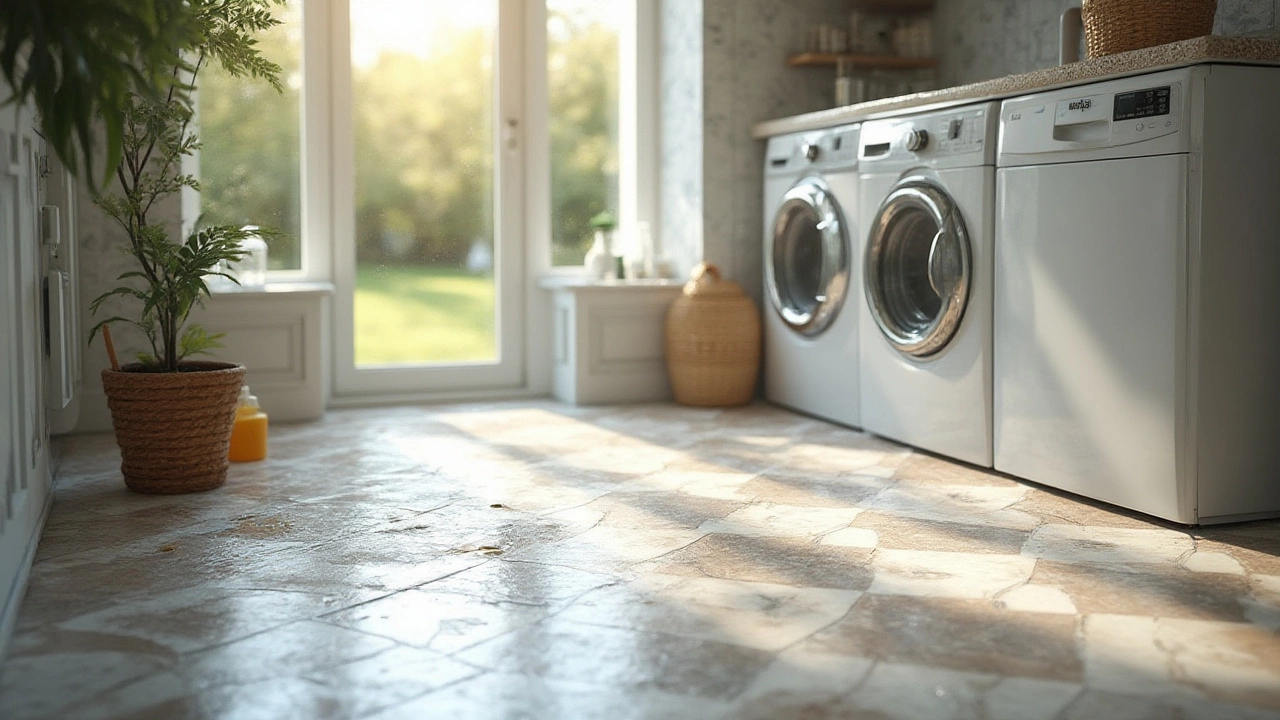
It looks so much tidier when the flooring in your laundry room runs wall-to-wall, right under the washer and dryer, uninterrupted. That’s reason number one most people do it: it just looks better. No gross edges for dirt to sneak down, no fiddly cuts around appliance legs, and you avoid the awkward gap if you end up with a smaller appliance later. Especially in newer condos and houses built in Vancouver, seamless flooring is standard. But—I can tell you from some soggy experience—there are real upsides and downsides to weigh here.
Let’s talk pros. First off, a flat, even surface keeps your washer and dryer supported. If your machines wobble, that’s a recipe for wear, catastrophic walking, and even failure. Manufacturers like Samsung and LG even mention in their installation manuals that machines work best on a stable, level surface—the more solid the better. This is where tile, luxury vinyl, or concrete shines. Also, full-coverage flooring makes it way easier to clean under these hulking beasts, especially in laundry rooms where socks and lint seem to breed under appliances.
But here’s the other side. If you use floating laminate or engineered hardwood, running it under a heavy appliance can void the warranty. Flooring needs to expand and contract as humidity changes. When a heavy washer or dryer pins it down tight, you risk the floor buckling or separating at the seams. Worse, if there’s a water leak or a backup—pretty common with washers—or if your dryer hose lets moisture loose, that beautiful floor can soak up water like a sponge. Even top-rated waterproof floors have limits. Real world: a friend in Kitsilano found out the hard way last year when a slow-leak hose warped her new vinyl planks. She had to pull the washer, dryer, and half the floor. There are horror stories about replacement costs ticking past $1,000 for that little corner of the house.
Certain older homes in Vancouver and across Canada have another quirk: the laundry rooms often have a sloped or sunken floor with a drain. Sometimes, contractors recommend that the flooring stops right at the front edge of the appliances to avoid interfering with drainage or trapping water. It’s not pretty, but replacing a patch of sheet vinyl is a lot easier than a flooded subfloor or major reno.
Types of Flooring and Washer/Dryer Compatibility
The right answer often depends on what type of floor you actually want. Let’s run through the usual suspects:
- Tile (Ceramic, Porcelain, or Natural Stone): Bombproof. These materials won’t care about the weight or an occasional leak. Most pros say to run tile wall-to-wall if you can. It’s also slippy when wet, so consider adding floor mats or runners.
- Luxury Vinyl Plank (LVP) or Tile (LVT): These are a favorite for families (trust me, Soren and Iris have put ours through its paces). Properly glued down, LVP is water-resistant and can shrug off a minor leak. The click-and-lock floating type, though, is riskier; it can separate if appliances move or if there’s a lot of water.
- Laminates: Classic floating laminate will almost always warn against installing under heavy appliances. The click-lock system isn’t designed for heavy loads, and leaks can spell disaster.
- Sheet Vinyl: This is an unsung hero, especially in older places. It's a continuous sheet, so water can’t slip underneath. Easy to clean but needs careful installation to prevent shifting when you push or pull the appliances.
- Hardwood or Engineered Wood: Looks amazing, but it’s risky anywhere near moisture. Most people who do this treat it as a design flex, but they’re gambling on never having a washer incident.
- Concrete: Very common in basements. You can paint, seal or epoxy-coat it for low maintenance and serious durability. If your machines flood, concrete’s about the only surface that won’t care.
One thing people forget: new washer/dryer models are getting heavier. A front-loader can weigh close to 250 lbs once it’s full of water and laundry. Toss in a pedestal and storage drawer underneath, and you’re dropping the equivalent of a grown moose on that spot of floor. Check this table for an idea of how different machines stack up:
| Appliance Type | Average Weight (Empty) | Footprint (inches) |
|---|---|---|
| Front-load Washer | 200-250 lbs | 27 x 31 |
| Top-load Washer | 150-190 lbs | 27 x 27 |
| Dryer | 120-170 lbs | 27 x 31 |
| Stacked Set (Total) | 320-410 lbs | 27 x 31 |
When you shove that kind of weight onto floating planks or fragile tile, stuff can shift. You’re not just worrying about installation headaches—you’re thinking long term.
Step-By-Step Guide: Best Practices for Laundry Room Flooring
If you’re remodeling, here’s the playbook most pros follow (and a few things I learned the hard way with my last reno):
- Choose the Right Flooring: If possible, pick something rated as waterproof and heavy-appliance-safe. Sheet vinyl, glue-down LVP, or tile are strong choices. Think about kids, pets, and messy hobbies—whatever’s going to happen in that room.
- Prepare the Subfloor: Make sure it’s clean, dry, and flat. Even the best floor fails if it’s laid over an uneven or wet subfloor. Look for signs of previous leaks or rot. If the floor feels squishy, it’s probably worth patching or replacing now before piling machines on top.
- Run Flooring Wall-to-Wall (Usually): In most modern homes, flooring is installed under the washer and dryer. This way, if you ever swap out appliances for smaller or larger ones, you’re not left with a weird bare patch. For floating systems, follow the manufacturer’s guidance—sometimes you should install up to the edge and use a trim or expansion gap to protect the planks.
- Add a Protective Tray or Pan: In Vancouver, insurance companies have started asking about these. Washer drain pans or laundry trays catch small leaks and make it easy to spot trouble early. Some codes even require them in condos and upstairs rooms. These sit on top of the flooring and don’t hurt most surfaces.
- Level and Protect: Before you move the appliances in, double-check the floor for dirt and grit. Use soft furniture slides or leveling pads under each leg. Especially with tile, this stops micro-cracks from the appliance feet grinding into grout.
- Connect Water and Venting Carefully: Tighten but do not overtighten the hoses, and use new rubber washers every time. For gas dryers, schedule a pro—seriously, don’t risk leaks. Test all drains and fill the washer once, watching for leaks before scooting it into place.
- Leave Expansion Space: If you’re laying floating or click-lock floors, leave a small expansion gap at all walls as manufacturer suggests. Cover gaps with baseboard or shoe molding after appliances are installed.
- Plan for Maintenance: Don’t block access to shutoff valves, vent connections, or drains with built-in cabinetry or a raised platform. If you ever get a leak, you want to be able to shut things down fast.
Little details can save huge headaches. For example—keep a few extra tiles or planks handy if you ever need a quick patch. And never caulk your appliances to the floor. I saw one place where the owners tried to seal down their washer to stop “walking.” When it came time to fix a hose, the entire subfloor came up with the machine. Ouch.
Common Mistakes When Installing Flooring Under Laundry Appliances
You’d be amazed how often people (and, let’s be honest, contractors) skip best practices and end up stuck with expensive fixes. Here are the repeat offenders I see whenever I peer behind someone’s laundry setup:
- Poor Planning for Leaks: Even if you think your machines are bombproof, hoses, valves or the drain can let go. People install hardwood under the washer, thinking it’ll never get wet. Newsflash: water finds a way. Statistics from home insurance claims in Canada show that washing machine leaks are among the top three sources of household water damage, especially in second-floor laundry rooms.
- Using the Wrong Underlayment: If you put a soft foam underlay under floating vinyl or laminate beneath heavy appliances, those feet compress it—hard. This sends the joints out of alignment and can even turn a seamless floor into a wavy mess. Manufacturers often specify a firm or no underlayment in appliance-heavy areas.
- Ignoring Expansion Gaps: No matter how tight your laundry layout, the floor material needs space to expand. Cramming planks tight to the walls or appliances might look tidy but leads to buckling under pressure or heat. Always follow the expansion gap guidelines.
- Not Leveling the Floor: Front-load washers especially hate being even a hair off-level. This leads to noise, wear, and water that pools rather than draining. Use a carpenter’s level before and after you move machines back in.
- Forgetting about Vibration: The strain of spinning at 1200 RPM will creep into the subfloor. If you’re using tile, consider a special vibration-absorbing pad designed for washers/dryers; you’ll save grout and maybe keep your machines from migrating across the room over time.
- Making Repairs Hard: Sometimes, people tile around their machines without leaving an access hatch or lifting the appliances out first. Trust me—removing an appliance that’s grouted into place is a brutal way to start a Saturday. Either tile wall-to-wall or leave the appliances out entirely until flooring’s done.
Here’s something else: always double-check what your warranty covers. Most flooring makers spell out specific requirements for appliance installations, including weight specs and moisture limitations. If you mess with their recommendations, you could be left footing the bill if something fails. Also, some appliance manufacturers will blame an uneven floor if your washer has vibration issues, which can void the support contract.
The last bit nobody tells you about: resale. Future buyers or home inspectors will notice if the flooring is patched, sunken, or poorly finished under the machines. If you go for a mortgage appraisal or insurance update, photos of a slick, wall-to-wall job under the laundry pair give the impression you took care of the place—little details go a long way in making a home feel put together.
So here’s my dad tip: when in doubt, go for the full-floor install with the right water-resistant product and plan for future leaks or repair needs. Soren’s managed to knock nearly everything off balance in our house, but the floor under the washer hasn’t budged once. That peace of mind? Worth every penny—especially when it’s time to throw in yet another muddy soccer kit.